
Creating a Collection
Collections group related nodes together within your CORAS map, creating a higher-level organizational layer above individual programs or units. A collection might represent an entire portfolio, a mission area, or a command. Collections enable cross-cutting analysis — Gary and SmartBoards can aggregate data across all nodes within a collection, giving leadership a unified view of programs that share a common mission thread.
When to Use This
Organizing a portfolio — Group related program nodes under a collection for portfolio-level visibility and reporting.
Enabling cross-program analysis — Collections let SmartBoards and Gary analyze patterns across multiple nodes simultaneously.
Scoping access at scale — Assign user group permissions at the collection level to grant access to all nodes within it at once.
Creating a Collection
Collections allow you to group related nodes together within your CORAS map. You can create collections, add nodes directly to them, or move existing nodes into a collection.
Create a New Collection
Hover over the root and select the "+" (plus sign) to add new.
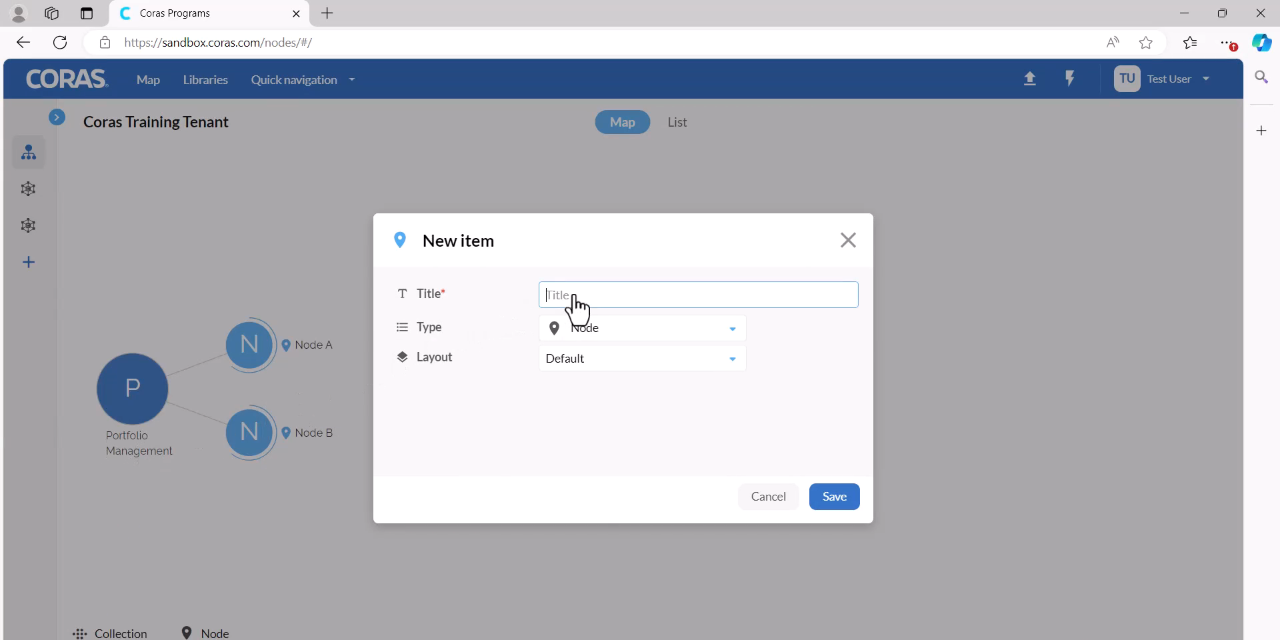
Enter a title for the collection.
Under Type, ensure Collection is selected.
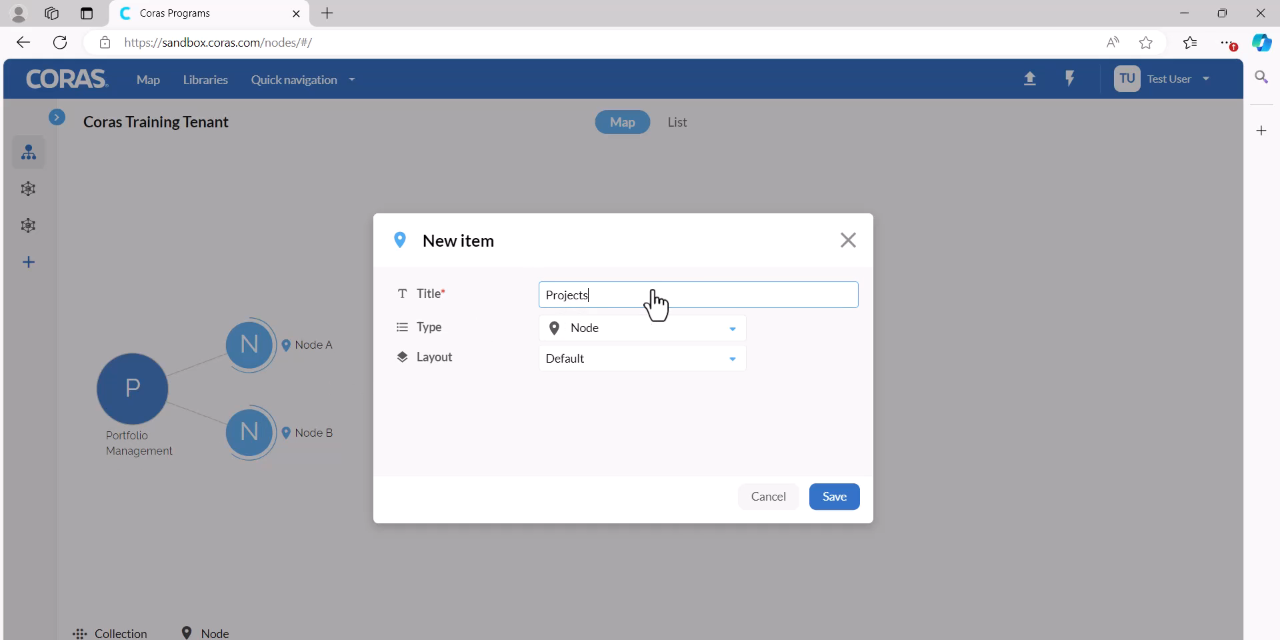
Click Save.
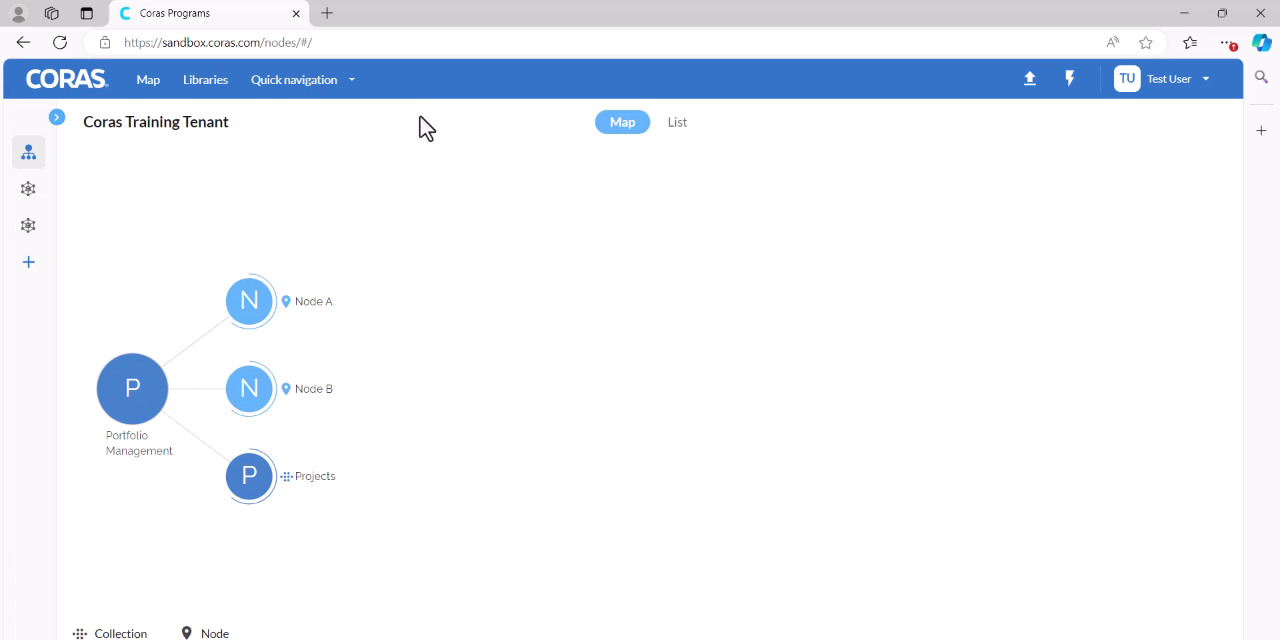
Add Nodes Directly to a Collection
Hover over the collection and select the + (plus sign).
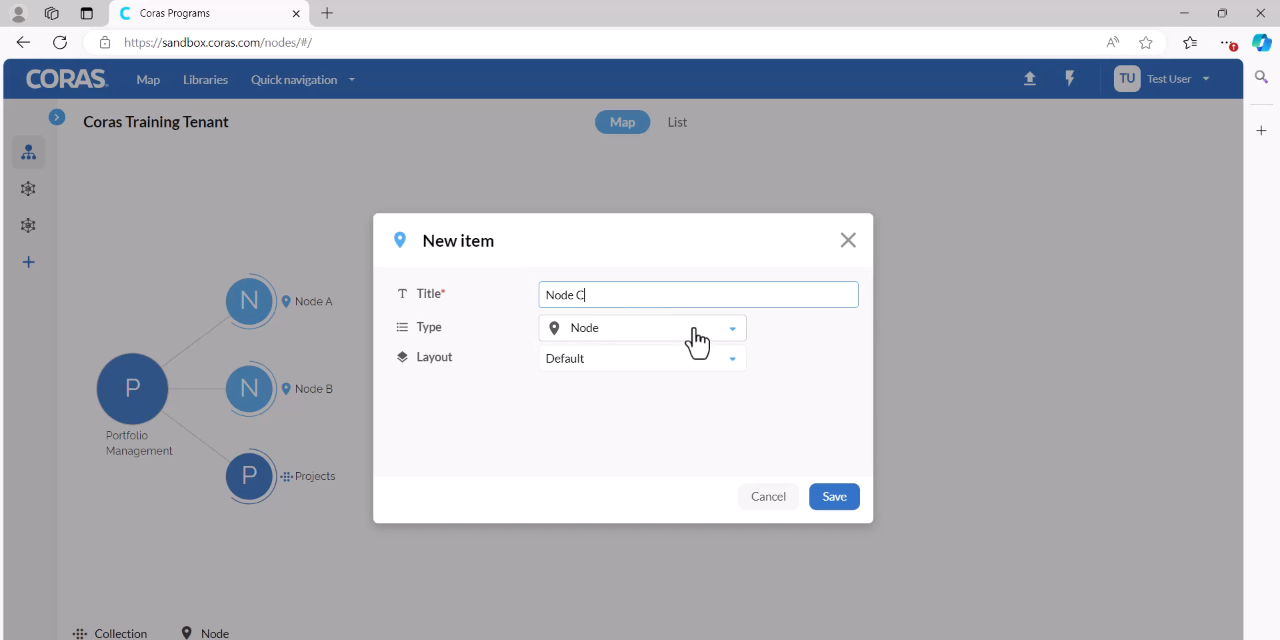
Enter a title for the node and click Save.
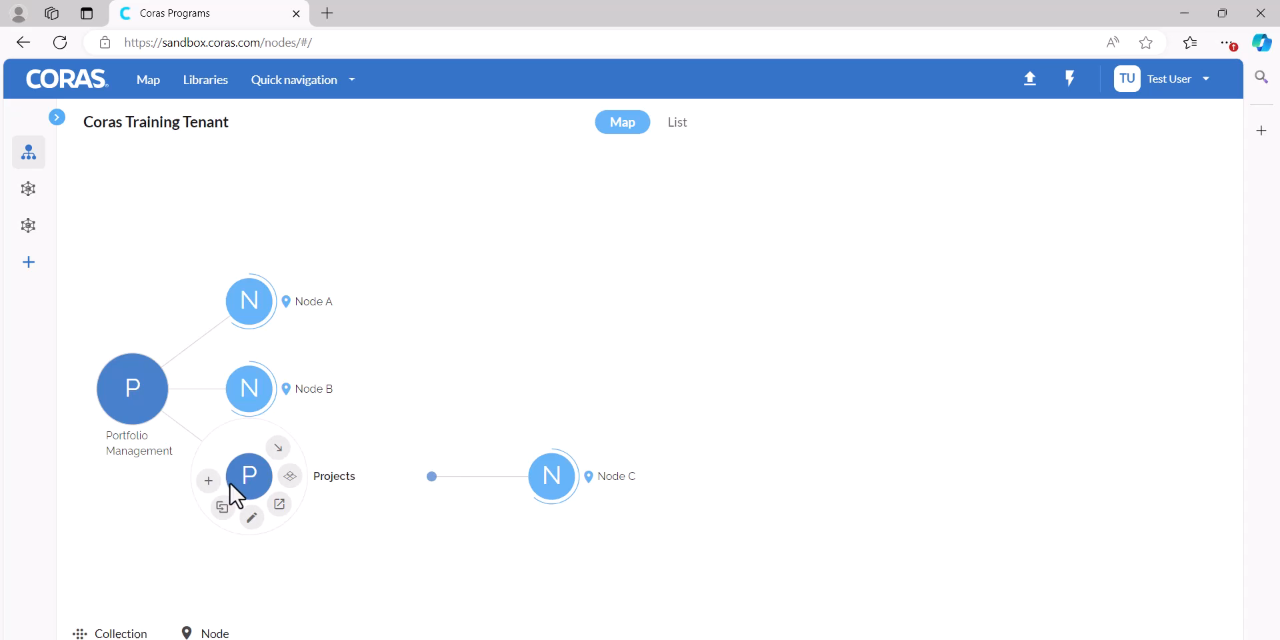
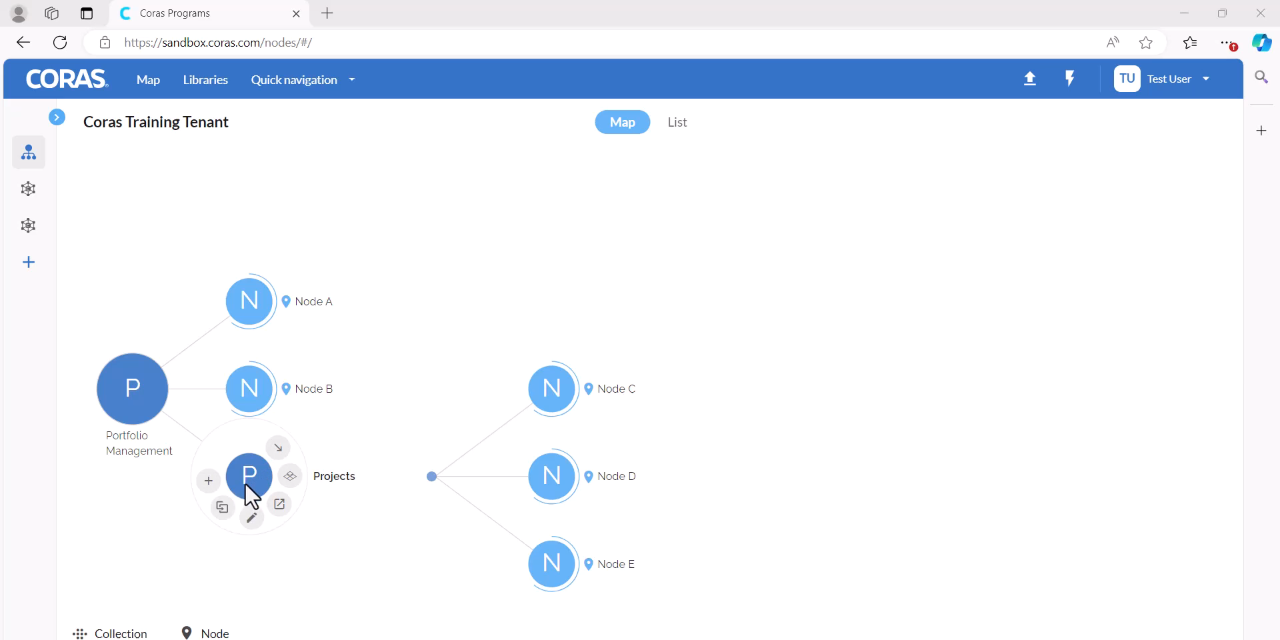
Repeat to add additional nodes. Select the + (plus sign) on the collection, enter a title, and click Save.
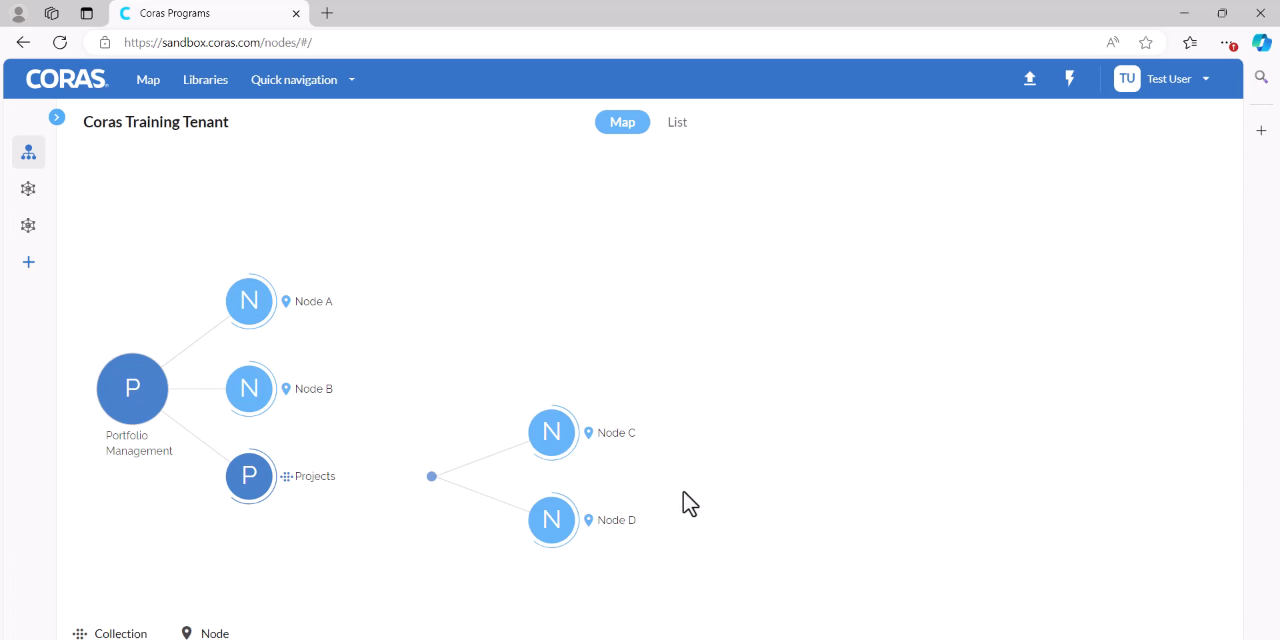
Move Existing Nodes into a Collection
There are two ways to move nodes into a collection:
Option A: Move from the Collection
Hover over the target collection and select the Move icon.
On the left-hand side, select the node you want to move.
On the right-hand side, select the destination collection.
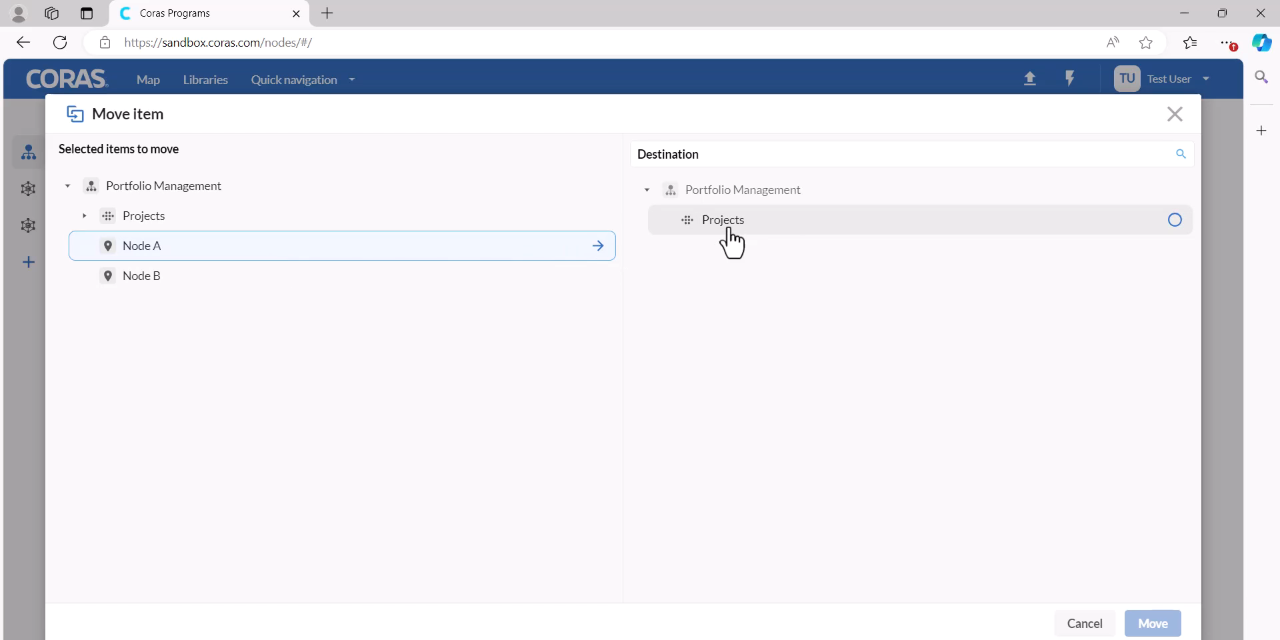
Click Move.
Option B: Move from the Node
Hover over the node you want to move and select the Move icon.
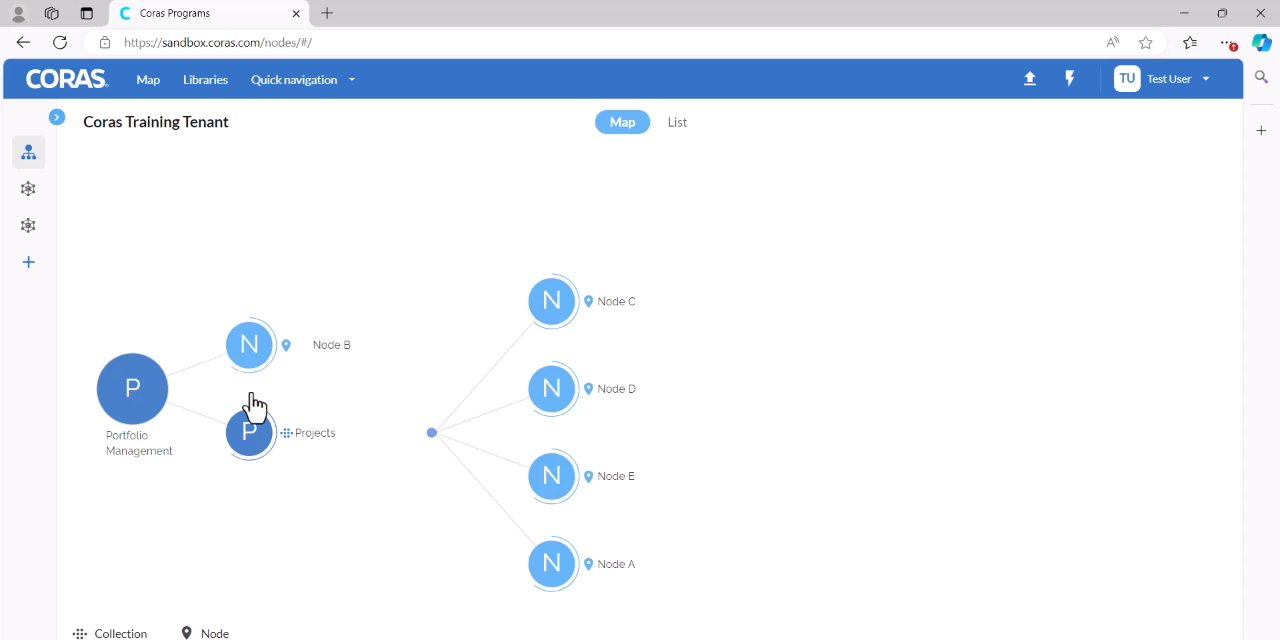
On the left-hand side, confirm the node to move is selected.
On the right-hand side, select the destination collection.
Click Move.
Contact your Customer Success Manager or visit the Customer Resource Center for additional support with collections, nodes, and map structure.