
Set Up a SmartList
SmartLists are CORAS's configurable data views — structured tables that display, filter, and organize the items within a node. A list configuration defines which fields are visible and how data is displayed in your SmartList. A well-configured SmartList becomes the operational workspace where teams enter data, track progress, and interact with items that GARY and SmartBoards then analyze at scale.
When to Use This
Creating a new workspace — Configure the list that will serve as the primary data entry and tracking view for your team.
Customizing views for different audiences — Tailor which columns appear so each user group sees the data most relevant to their role.
Preparing data for analysis — Ensure the right fields are captured so SmartBoards, SmartLanes, and GARY can deliver meaningful insights.
Creating a List Configuration
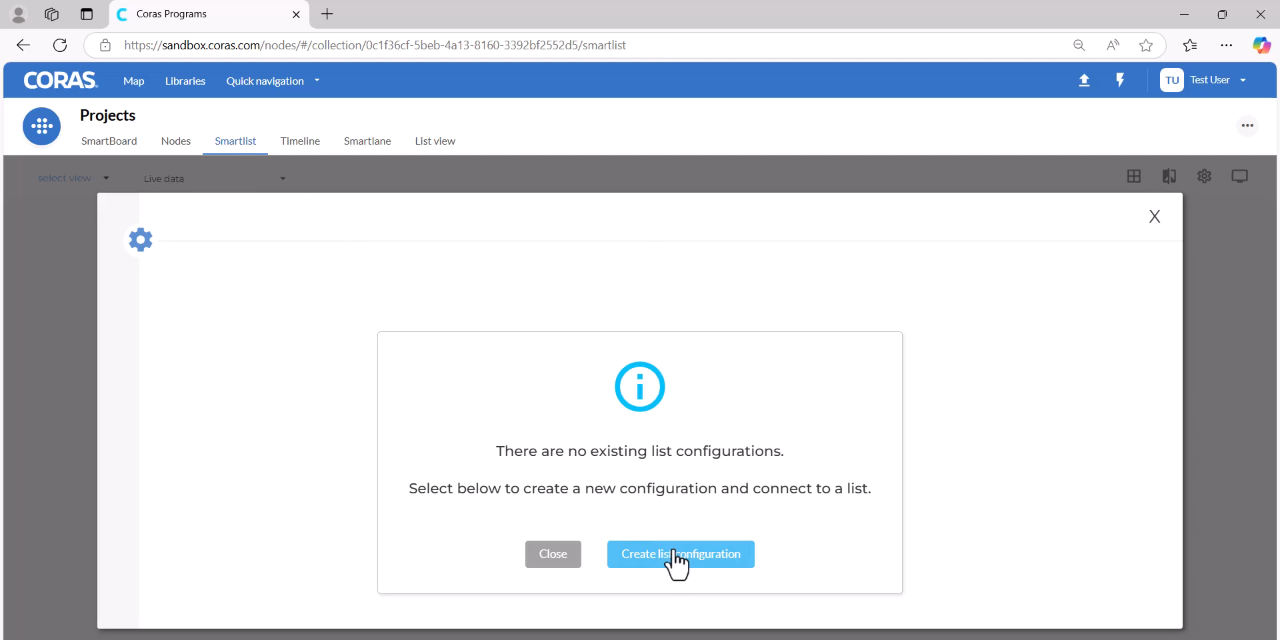
Navigate to the collection or node where you want to create your smart list.
Click Smart List.
Select Create List Configuration.
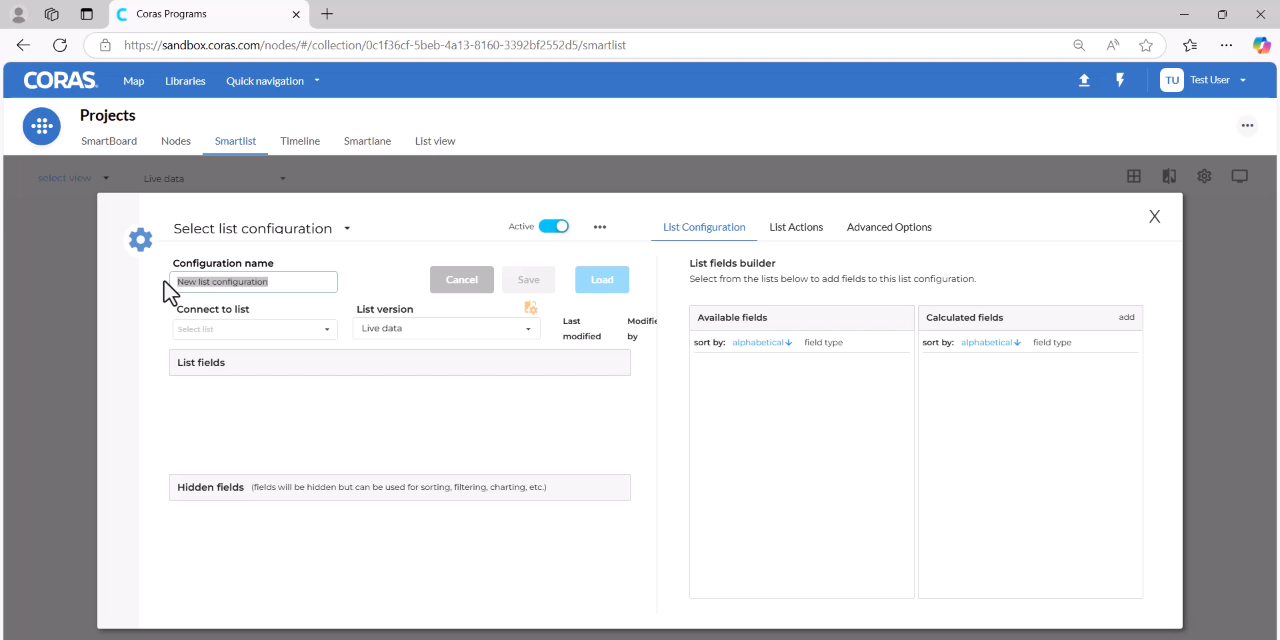
Configuring the List
Enter a title for your configuration name.
Connect the configuration to the ingested list you want to build the smart list upon.
Click Load.
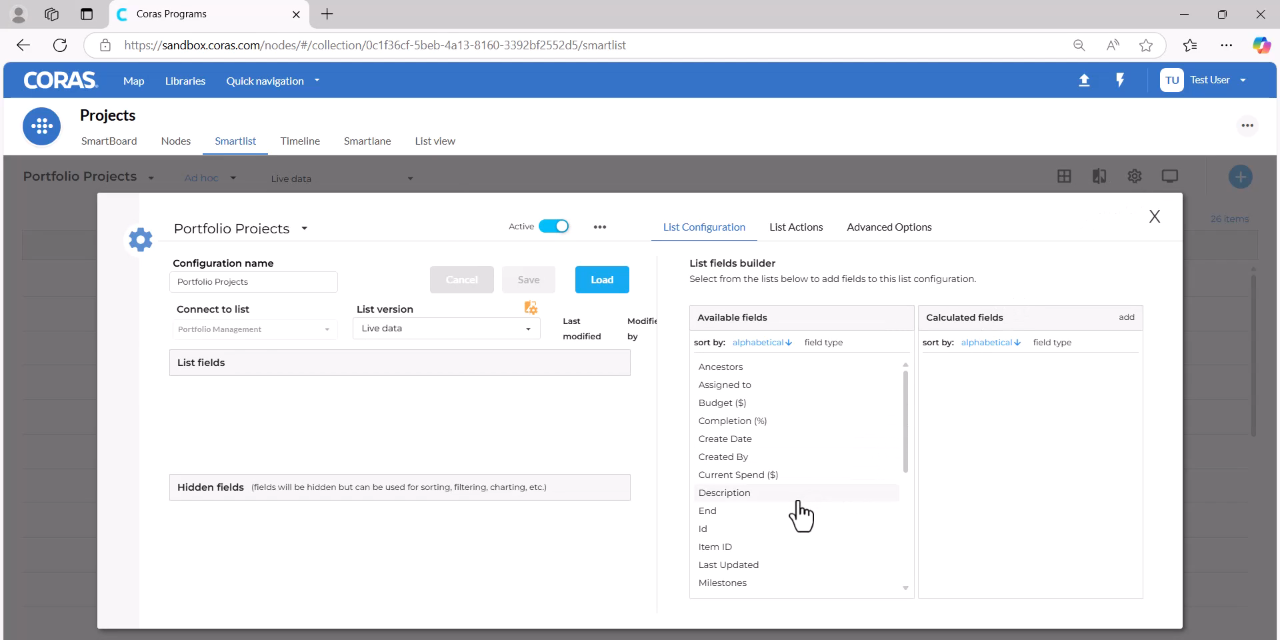
Adding Fields to the Smart List
Once the configuration is created, click the settings gear icon.
Scroll through the available fields and click to add each field you want displayed on the smart list.
Click Load.
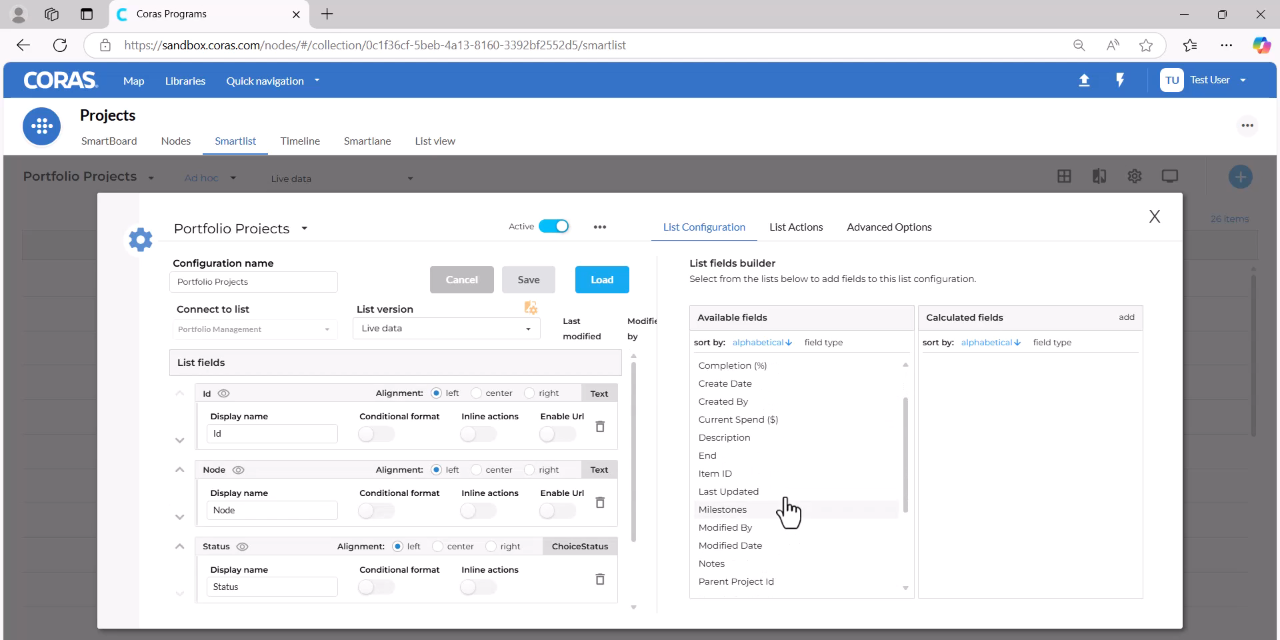
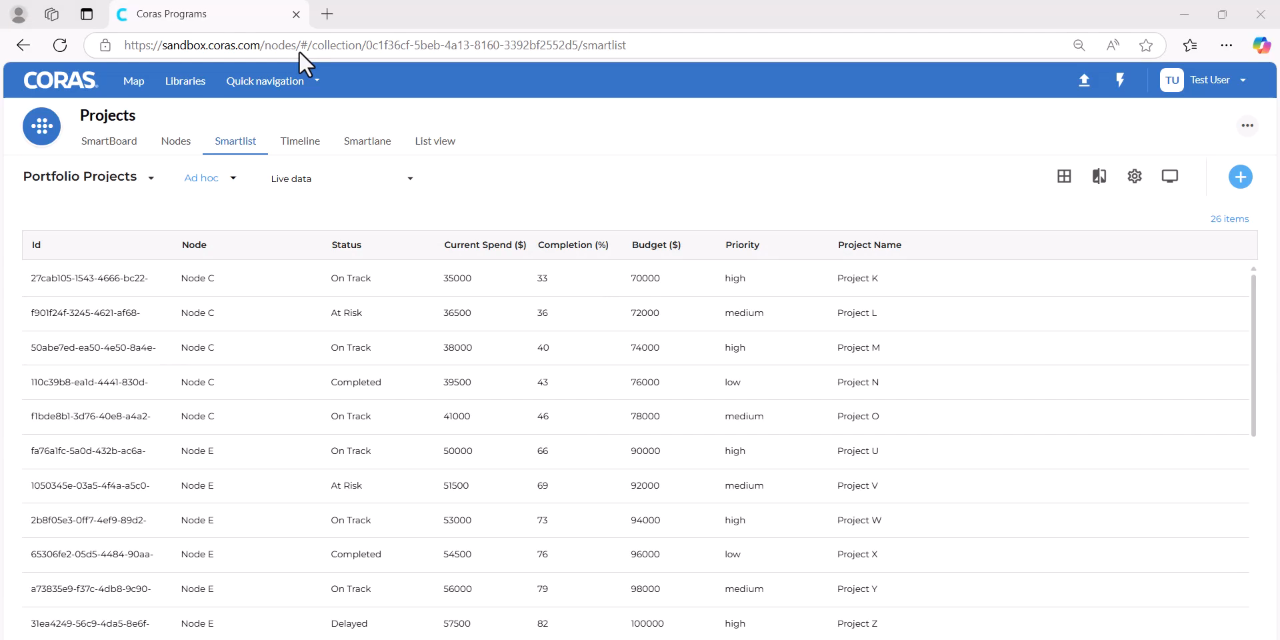
Viewing the Result
The smart list now displays with all selected fields visible as columns.
Next Step
Ready to configure conditional formatting, charts, grouping, and more? See SmartLists — Advanced Configuration.