
Libraries
Duration: 1:33
Libraries serve two purposes in CORAS: they store files that Gary can reference in conversations, and they define reusable data schemas for structured data entry. This article covers both.
Why It Matters
The Library is your organization's shared file store — documents, references, SOPs, and supporting materials your whole tenant can access. Once a file is in the Library and analyzed, any user can attach it to a Gary conversation without uploading it again. Unlike files you drop directly into chat, Library files persist across conversations and don't need to be re-uploaded each time.
What to Know Before You Upload
Library files are visible to everyone in your tenant. Do not upload restricted, classified, or sensitive files to the Library unless your organization has configured folder-level access controls. If you're unsure, ask your admin.
Excel files (.xlsx) don't belong in the Library. GARY can't use them the same way. Excel data should go through Central Ingestion so records land in a SmartList where Gary can analyze them properly. See Getting Data into CORAS.
Supported file types: PDF, Word (.docx), PowerPoint (.pptx), plain text (.txt), Markdown (.md), JSON, and Outlook email (.msg). Word, PowerPoint, and Excel files are converted to PDF for AI processing — Gary will refer to them as PDFs in its responses. This is expected.
Step 1: Upload the File to the Library
Click your name (top right) → Admin Settings
In the left panel, select Libraries
Pick the library — or the folder inside it — where the file belongs
Click Upload (top right) and select the file from your device
Note: Only users with Library management access can upload files. If you don't see the Upload button, contact your CORAS administrator.
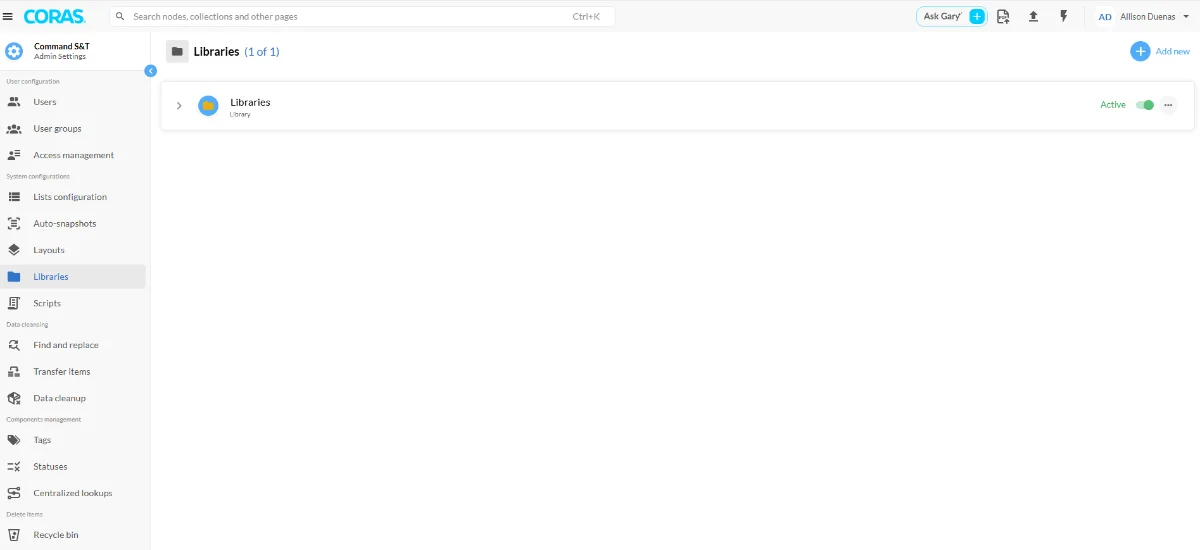
The library will appear in the list and be set to Active by default.
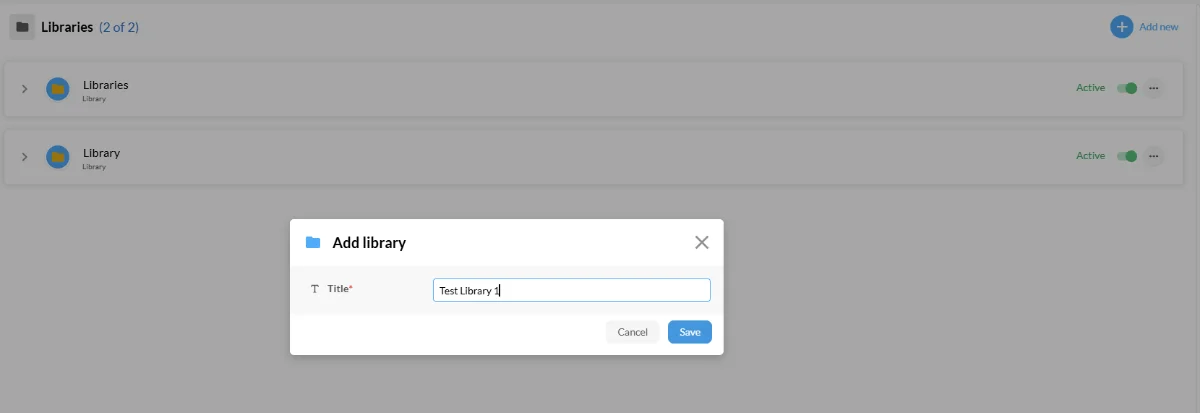
Step 2 — Analyze the File
Library files are not usable by GARY until they've been analyzed. Uploading alone is not enough — the analyze step happens in GARY.
Open GARY
In the left sidebar, click Sources
Select File Library
Find your file and click Analyze next to the file name
Wait a few seconds for processing to complete
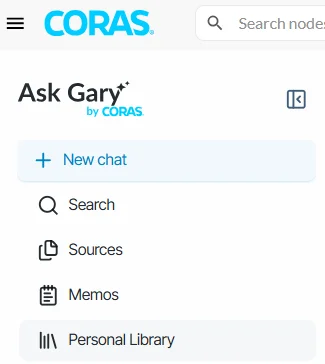
Note: Analysis time depends on file size. Large documents may take a few minutes. If the file doesn't become available after a few minutes, try refreshing the page.
Step 3 — Ask Gary About the File
Once analyzed, the file is available to use in any GARY conversation.
In the left sidebar, click Sources → File Library
Select the file you want GARY to reference
Start a new chat and ask your question — GARY now has access to that file as context
Library files persist across conversations. Unlike files you drag and drop directly into the chat window (which are session-only), a Library file you analyze in one conversation can be pulled into any future conversation — it isn't tied to a single session.
Adding Fields to a Schema
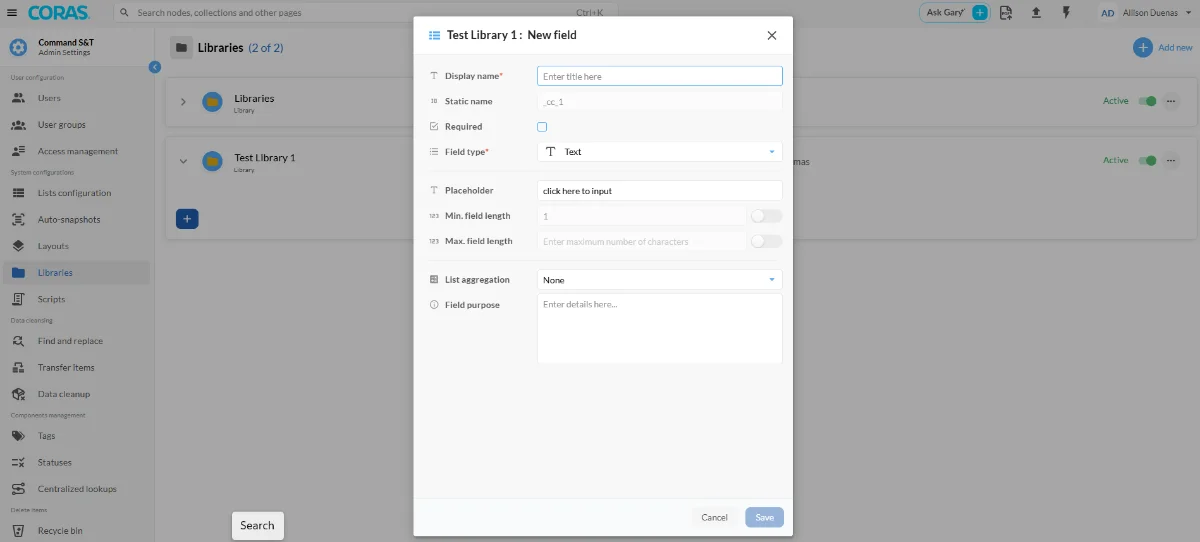
When adding a field, you will configure:
Display name — The label shown to users (required)
Field type — The data type (e.g., Text)
Required — Whether the field must be populated
Placeholder — Helper text shown in the input
Min / Max field length — Optional character constraints
List aggregation — How the field aggregates across list items
Field purpose — Internal documentation for the field's intent
Click Save when the field is configured.

Adding a Schema
Each library can contain one or more schemas. A schema defines the structure of data stored in that library.
Open a library and select the Schemas tab.
Click + Add Schema.
Enter a schema name.
Add fields using Add field.
Click Save.

Activating and Deactivating Libraries
Use the Active toggle on each library to enable or disable it. Inactive libraries remain in the system but are not available for use. Use the three-dot menu for additional options including editing or deleting a library.
Get Help
If Gary isn't returning results you expect from a Library file, confirm:
The file status shows System Document (not just Uploaded)
You selected the file in the source picker before sending your message
The file type is supported
Contact your CORAS administrator or Customer Success Manager if analysis fails or the file doesn't appear in the source picker.