
Statuses
Statuses in CORAS provide a standardized way to track where items stand in their lifecycle — from draft to in-progress to complete. Consistent status definitions across your tenant enable automated workflows, conditional formatting in SmartLists, and real-time visibility into mission readiness on SmartBoards. When leadership needs a quick read on which programs are on track and which need attention, statuses are what power that view.
When to Use This
Defining workflow stages — Create statuses that match your organization's process (e.g., Draft, In Review, Approved, Complete).
Driving conditional formatting — SmartLists and SmartBoards use statuses to apply color coding (green/yellow/red) automatically.
Triggering automations — Status changes can trigger notifications, item movements, and other automated actions.
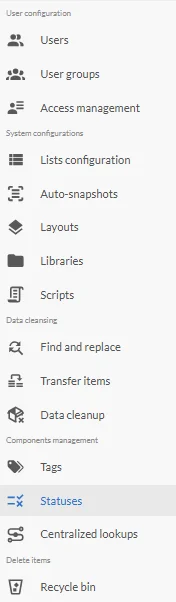
Navigating to Statuses
Select your name at the top of the screen.
Click Admin Settings.
On the left side panel, scroll down to Statuses.
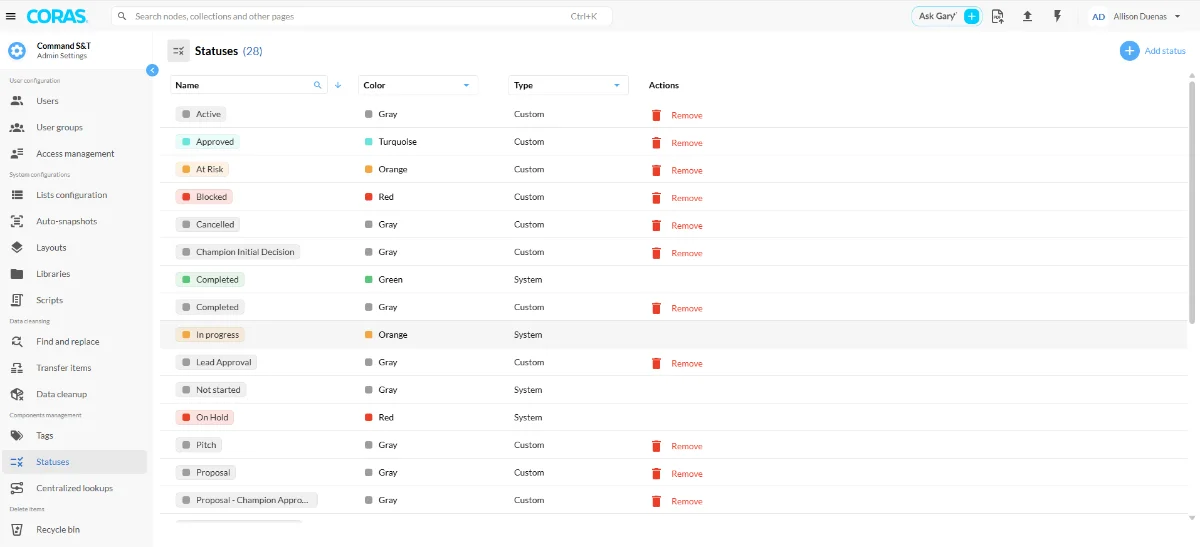
Default statuses in CORAS cannot be removed. Only statuses that you add will have a remove option.
Adding a Status
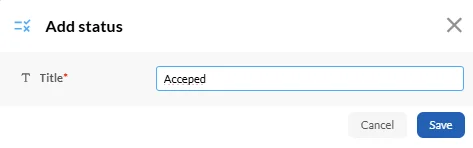
Click the plus sign (+) at the top right.
Enter a title for the new status.
Click Save.
The new status now appears at the top of the list. Repeat the process to add additional statuses.
Changing a Status Color
Under the Colors tab, locate the status you want to update.
Select the dropdown for that status.
Pick the desired color.
The selected color is now applied to the status.

